|
The CD contains files to work with, and you even get a finished image to compare to your attempt. With the description
of the lessons, I will include some of the images that you start with and then the results from the tutorials.
A Quick Tour of Adobe Photoshop--This
is a basic introduction to different tools and techniques, such as selecting, moving, resizing, painting,
saving, layers and filters. With this quick tour, you start right
out creating images that look complex, but are simple to put together
in Photoshop.
tools and techniques, such as selecting, moving, resizing, painting,
saving, layers and filters. With this quick tour, you start right
out creating images that look complex, but are simple to put together
in Photoshop.
Lesson 1: Getting to Know the Work Area--As stated, this chapter deals with
the work environment, how to open files, select tools, and different palettes and views. With this lesson, there
is really not a specific tutorial. You just use a photo from the CD to practice with as you learn the work environment
of Photoshop.
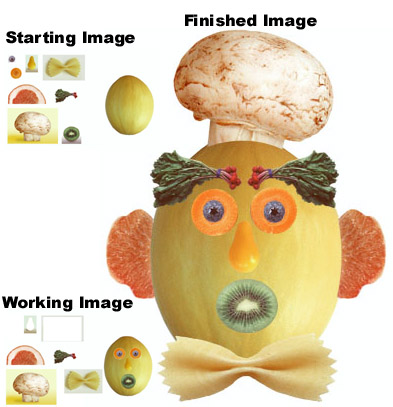
Lesson 2: Working With Selections--Here
the different selection tools a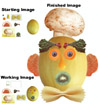 nd
techniques are demonstrated, when certain options work best, and combining
selection techniques. Using such tools as the rectangular marquee
tool, the elliptical marquee tool, the magic wand, and the magnetic
lasso tool, you learn to take sections of fruits and vegetables provided
in the first image and create Mr. Fruit and Vegetable Man! nd
techniques are demonstrated, when certain options work best, and combining
selection techniques. Using such tools as the rectangular marquee
tool, the elliptical marquee tool, the magic wand, and the magnetic
lasso tool, you learn to take sections of fruits and vegetables provided
in the first image and create Mr. Fruit and Vegetable Man!
Lesson 3: Layer Basics--Creating,
viewing and organizing layers, changin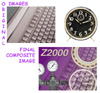 g
the opacity and mode, adding effects and text, flattening and saving
layers are discussed. By isolating different parts of an image on
layers, each layer can then be edited as discrete artwork, which allows
you flexibility in composing and revising an image. The image to the
right was produced in this manner. g
the opacity and mode, adding effects and text, flattening and saving
layers are discussed. By isolating different parts of an image on
layers, each layer can then be edited as discrete artwork, which allows
you flexibility in composing and revising an image. The image to the
right was produced in this manner.
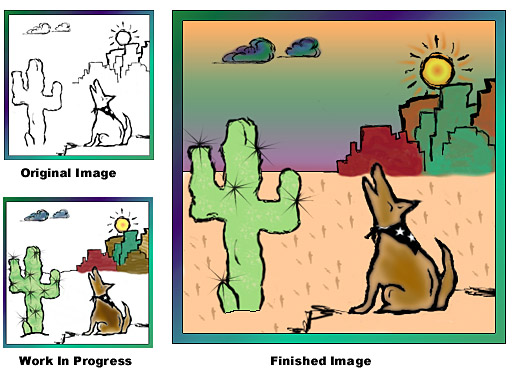
Lesson 4: Painting and Editing--The
following techniques are explained: 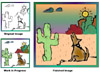 setting
up a painting or editing tool, customizing tools, erasing, filling
with the paint bucket tool, airbrushing, gradients, textures and other
effects. This is a fun lesson, where you are using painting tools
to color the image of Ms. Claudia, the coyote. setting
up a painting or editing tool, customizing tools, erasing, filling
with the paint bucket tool, airbrushing, gradients, textures and other
effects. This is a fun lesson, where you are using painting tools
to color the image of Ms. Claudia, the coyote.
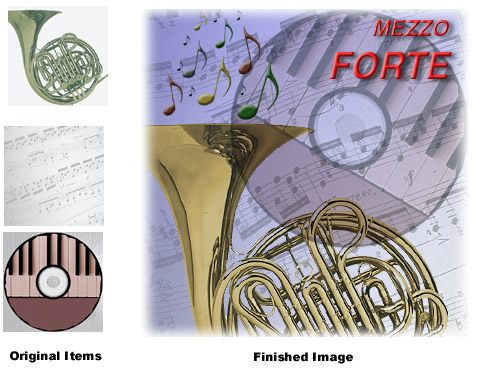
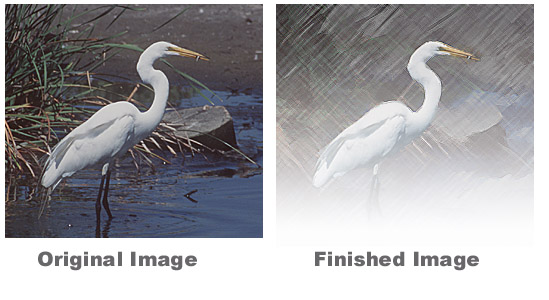
Lesson 5: Masks and Channels--Masks
and channels in Photoshop are one of the more complex concepts. In
this chapter you will learn to refine a partial selection using a
quick mask, save a selection as a channel mask, view a mask usin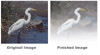 g the Channels palette,
load a saved mask and apply effects, paint in a mask to modify a selection,
and create and use a gradient mask. You create a quick mask, save
it as a selection, inverse the selection, and apply special effects
to only the background to create the finished image to the right. g the Channels palette,
load a saved mask and apply effects, paint in a mask to modify a selection,
and create and use a gradient mask. You create a quick mask, save
it as a selection, inverse the selection, and apply special effects
to only the background to create the finished image to the right.
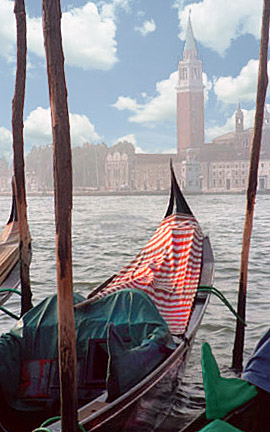
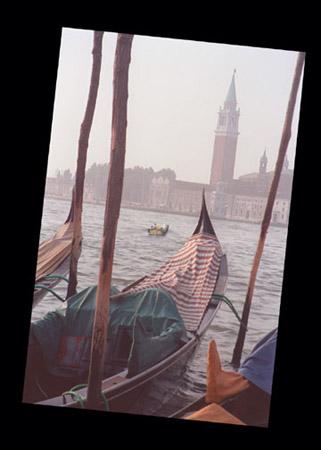
Lesson 6: Photo Retouching--Retouching
photos can be fun. This lesson contains information on choosing the
correct resolution for a scanned photograph, croppi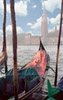 ng
an im ng
an im age
to final size, adjusting the tonal range of an image, removing a color
cast from an image using an adjustment layer, using the Replace Color
command to change the hue and saturation of a selected color in a
photograph, adjusting the saturation and brightness of isolated areas
of an image using the sponge and dodge tools, using the rubber stamp
tool to eliminate an unwanted object from an image, replacing parts
of an image with another image, applying the Unsharp Mask filter to
finish the photo-retouching process, and saving an Adobe Photoshop
file in a format that can be used by a page-layout program. This is
an important lesson for anyone that has photos that they want to retouch.
You start with the image on the left and after using the crop tool,
selections, and color adjustment, you finish with the image on the
right. age
to final size, adjusting the tonal range of an image, removing a color
cast from an image using an adjustment layer, using the Replace Color
command to change the hue and saturation of a selected color in a
photograph, adjusting the saturation and brightness of isolated areas
of an image using the sponge and dodge tools, using the rubber stamp
tool to eliminate an unwanted object from an image, replacing parts
of an image with another image, applying the Unsharp Mask filter to
finish the photo-retouching process, and saving an Adobe Photoshop
file in a format that can be used by a page-layout program. This is
an important lesson for anyone that has photos that they want to retouch.
You start with the image on the left and after using the crop tool,
selections, and color adjustment, you finish with the image on the
right.
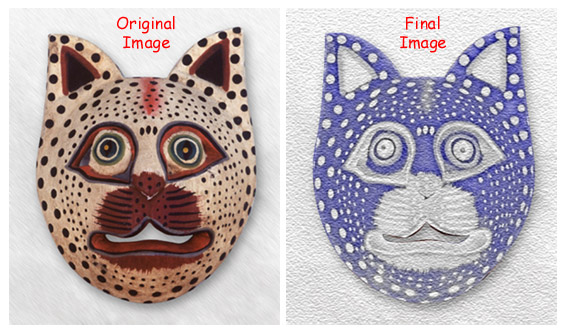
Lesson 7: Basic Pen Tool Techniques--You
will learn to practice dra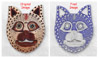 wing
straight and curved paths using the pen tool, save paths, fill and
stroke paths, edit paths using the path editing tools, convert a path
to a selection, and convert a selection to a path. To create the final
cat image, you draw a path around an image, convert it to a selection
and then apply a filter to the selection. wing
straight and curved paths using the pen tool, save paths, fill and
stroke paths, edit paths using the path editing tools, convert a path
to a selection, and convert a selection to a path. To create the final
cat image, you draw a path around an image, convert it to a selection
and then apply a filter to the selection.
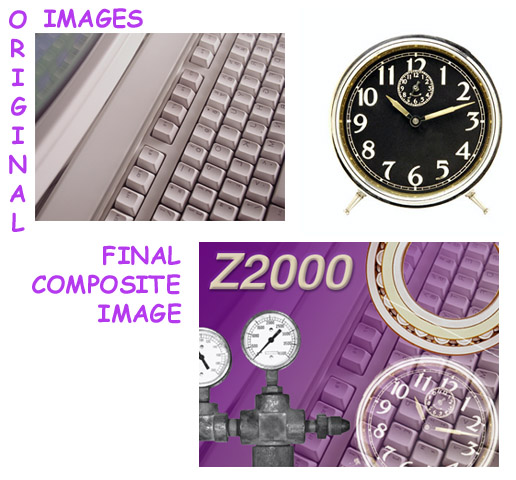
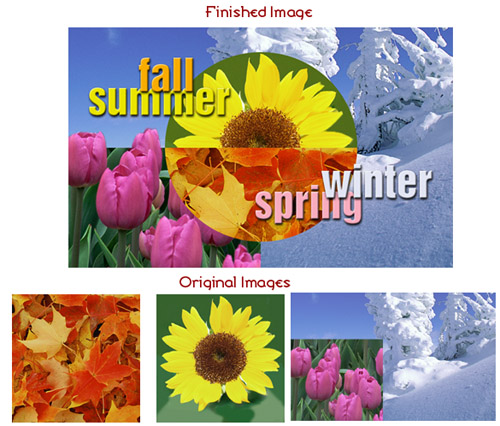
Lesson 8: Advanced Layer Techniques--Learning
to work with layers is a valuable tool in creating unique images.
In this lesson you will learn to add guides to an image to help you make selections and align artwork,
create and edit layer masks to selectively hide and reveal portions
of artwork on a layer, align images and layers, create clipping groups,
which let you use an image on one layer as a mask for artwork on other
layers, add adjustment layers to an image and use them to apply color
and tonal adjustments without permanently changing pixel data, add
layer effects to a type layer and apply the effects to multiple layers,
delete a layer mask, and save layered files. This lesson shows you
how to create the complex image to the right with layering techniques.
guides to an image to help you make selections and align artwork,
create and edit layer masks to selectively hide and reveal portions
of artwork on a layer, align images and layers, create clipping groups,
which let you use an image on one layer as a mask for artwork on other
layers, add adjustment layers to an image and use them to apply color
and tonal adjustments without permanently changing pixel data, add
layer effects to a type layer and apply the effects to multiple layers,
delete a layer mask, and save layered files. This lesson shows you
how to create the complex image to the right with layering techniques.
Lesson 9: Creating Special Effects--Special
effects is where you can really be creative. Concepts covered in this
lesson show how to add a grid to an image to help you make precise
selections; desaturate a selection without affecting the color in
other parts of the image, paint on a layer above the artwork to color
the underlying artwork without changing it permanently, add an adjustment
layer to make a color correctio n
to a selection, and apply filters to selections to create various
effects. For this lesson, you work with various images of pears, making
selections, saving selections, and then apply different effects to
them. If you click on the image to the right, which is the original,
you will see my finished product. n
to a selection, and apply filters to selections to create various
effects. For this lesson, you work with various images of pears, making
selections, saving selections, and then apply different effects to
them. If you click on the image to the right, which is the original,
you will see my finished product.
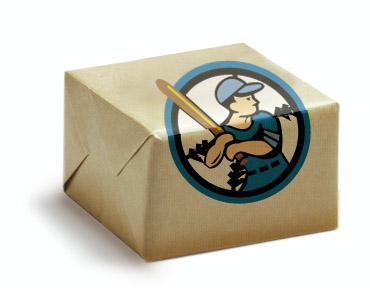
Lesson 10: Combining Illustrator Graphics
and Photoshop Images--Working with graphics to place
in another program is explained here. You learn to diffe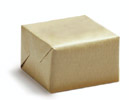 rentiate
between bit map and vector graphics, place an Adobe Illustrator graphic
in an Adobe Photoshop file, scale the placed graphic, distort a graphic
to match the perspective of a photograph, apply different blending
modes to a graphic, and use the Export Transparent Image wizard to
prepare a Photoshop image for use in an Illustrator file. If you click
on the gift box on the right, you will see a more interesting gift
box after a logo is placed on it. rentiate
between bit map and vector graphics, place an Adobe Illustrator graphic
in an Adobe Photoshop file, scale the placed graphic, distort a graphic
to match the perspective of a photograph, apply different blending
modes to a graphic, and use the Export Transparent Image wizard to
prepare a Photoshop image for use in an Illustrator file. If you click
on the gift box on the right, you will see a more interesting gift
box after a logo is placed on it.
Lesson 11: Preparing Images for Web Publication--This
lesson show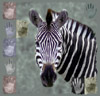 s
you how to determine which file formats and compression options are
appropriate for publishing specific types of images on the Web, prepare
four types of image for distribution on the Web, and use the Actions
palette to record a series of commands,and then run the action list
on a series of files to prepare them for Web distribution. This lesson
is very similar to the Quick Tour of ImageReady as it discusses optimizing
images for the Web. It does have an excellent tutorial on saving an
image with transparency using a channel. If you click on the zebra
photo on the right, you will see the same photo saved as a GIF with
transparent edges. s
you how to determine which file formats and compression options are
appropriate for publishing specific types of images on the Web, prepare
four types of image for distribution on the Web, and use the Actions
palette to record a series of commands,and then run the action list
on a series of files to prepare them for Web distribution. This lesson
is very similar to the Quick Tour of ImageReady as it discusses optimizing
images for the Web. It does have an excellent tutorial on saving an
image with transparency using a channel. If you click on the zebra
photo on the right, you will see the same photo saved as a GIF with
transparent edges.
Lesson 12: Preparing Images for Two-Color
Printing--Getting a gr asp
on color for printing is important. You will learn to use the Channel
Mixer command to convert a color image to monochrome and improve its
overall quality, adjust the tonal range of the image by assigning
black and white points, sharpen the image with the Unsharp Mask filter,
convert a color image to grayscale, and add spot color to selected
areas of the image. The image to the right is a full color image.
If you click on it, you will get a larger representation of the finished
image which is prepared for two-color printing. asp
on color for printing is important. You will learn to use the Channel
Mixer command to convert a color image to monochrome and improve its
overall quality, adjust the tonal range of the image by assigning
black and white points, sharpen the image with the Unsharp Mask filter,
convert a color image to grayscale, and add spot color to selected
areas of the image. The image to the right is a full color image.
If you click on it, you will get a larger representation of the finished
image which is prepared for two-color printing.
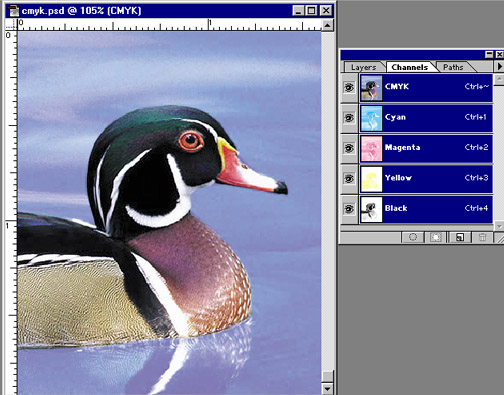
Lesson 13: Ensuring and Printing Accurate
Color--Further information on color is included
in this lesson. You will learn to calibrate your monitor so that it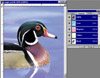 displays
color accurately, define RGB, grayscale, and CMYK color spaces for
displaying, editing, and printing images, create a color separation,
the process by which the colors in an RGB image are distributed to
the four process ink colors: cyan, magenta, yellow, and black, understand
how images are prepared for printing on-press, and prepare an image
for printing on a PostScript CMYK printer. displays
color accurately, define RGB, grayscale, and CMYK color spaces for
displaying, editing, and printing images, create a color separation,
the process by which the colors in an RGB image are distributed to
the four process ink colors: cyan, magenta, yellow, and black, understand
how images are prepared for printing on-press, and prepare an image
for printing on a PostScript CMYK printer.
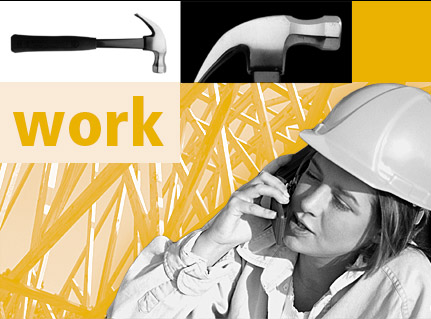
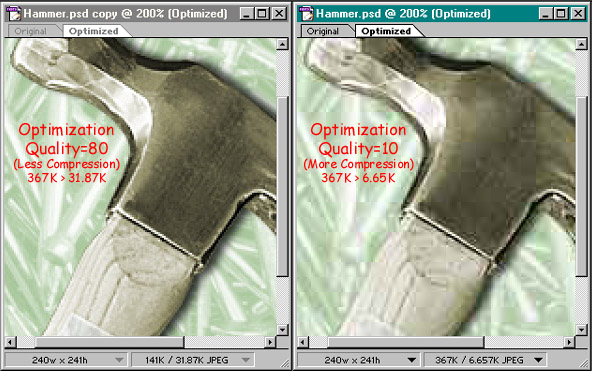
A Quick Tour of Adobe ImageReady--You
learn how to optimizing images for the Web; save a photograph as a
JPEG, save an illustration as a GIF, automate image optimization,
create an animated GIF file, add text to an image, automa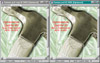 te a series of
tasks, and apply actions to a batch of images. The photo on the right
has two images of a hammer and nails and demonstrates how the quality
of an image is affected by compression: more compression equals lesser
quality; lesser compression equals better quality. The image on the
left has less compression and better quality, while the image on the
right has higher compression but the quality is poorer. te a series of
tasks, and apply actions to a batch of images. The photo on the right
has two images of a hammer and nails and demonstrates how the quality
of an image is affected by compression: more compression equals lesser
quality; lesser compression equals better quality. The image on the
left has less compression and better quality, while the image on the
right has higher compression but the quality is poorer.
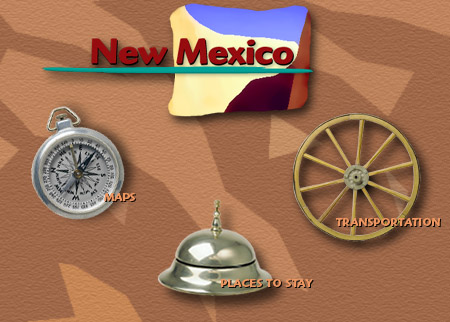
ImageReady Lesson 1: Optimizing Images
for Web Publication--This c hapter
discuss how to optimize an image in GIF format and adjust the optimization
settings to achieve the desired balance between file size and image
quality, adjust the amount of dithering applied to the image, define
a transparent background for the image, and create a hypertext image
map and export the image as an HTML file. In this lesson, you learn
a variety of important techniques for Web design and you make an image
map, which is an image file that contains multiple hypertext links
to other files on the Web. The image to the right is from the tutorial
in the book. hapter
discuss how to optimize an image in GIF format and adjust the optimization
settings to achieve the desired balance between file size and image
quality, adjust the amount of dithering applied to the image, define
a transparent background for the image, and create a hypertext image
map and export the image as an HTML file. In this lesson, you learn
a variety of important techniques for Web design and you make an image
map, which is an image file that contains multiple hypertext links
to other files on the Web. The image to the right is from the tutorial
in the book.
ImageReady Lesson 2: Creating Animated
Images--In this final c hapter
you will learn to use the Layers palette in conjunction with the Animation
palette to create animation sequences, preview animations in ImageReady
and in a Web browser, and open and edit an existing animated GIF image.
You can create a simple two-step animation by toggling the visibility
of two layers. The image to the right was created in this manner.
The blender image consists of several layers, with animation frames
that alternate between hiding and showing two layers representing
different positions of the blender pitcher. hapter
you will learn to use the Layers palette in conjunction with the Animation
palette to create animation sequences, preview animations in ImageReady
and in a Web browser, and open and edit an existing animated GIF image.
You can create a simple two-step animation by toggling the visibility
of two layers. The image to the right was created in this manner.
The blender image consists of several layers, with animation frames
that alternate between hiding and showing two layers representing
different positions of the blender pitcher.
|

 hor:
Team Adobe Development
hor:
Team Adobe Development