|
Sams Teach Yourself Adobe Photoshop 5 in 21 Days is a tutorial guide for
Photoshop 5. In 21 easy sessions, it leads you, step-by-step, through the program. It will provide you with a strong
foundation for working with Photoshop's tools, palettes, and dialog boxes. It walks you through all levels of examples--from
beginning to more advanced subjects such as Web graphics. There is a CD that comes with the book and it includes:
- All the example files from the book categorized by chapter;
- Over 7,000 ready-to-use images from Digital Stock;
- Adobe Certification Expert--a prep test developed in cooperation with Adobe;
- Third-party demo software from Adobe, Macromedia, Netscape, and others.
The User's Guide that comes with Photoshop 5 is very adequate and thorough. But User Guides never seem to have
enough tutorials. This book does. The author, T. Michael Clark, is a graphic artist, who owns and operates GrafX
Design, a Web site that features online tutorials for Photoshop, Paint Shop Pro, and CorelDraw, among other topics.
His site is: http://www.grafx-design.com and is well-worth a visit for
all the free information he gives you.
The Sams Teach Yourself series offers other books that are written with a clear and easy manner. The series
is aimed at the reader who does not already know how to use an application. The material is presented in a tutorial
approach to guide the reader through the learning process. The series includes: Sams Teach Yourself in 10 Minutes;
Sams Teach Yourself in 24 Hours; and Sams Teach Yourself in 21 Days.
|
|
The book is divided into 21 days or chapters. Each session includes step-by-step tutorials on how to use the
features covered in that chapter. These chapters are written with the goal of helping you gain the knowledge you
need to get you going as quickly as possible. Each chapter builds on the previous one, helping you tackle the program
in small, bite-sized pieces. This method will move you from the most basic uses of Photoshop 5 to some of the more
complex uses with relative ease. I went through the book, from cover to cover, and performed many of the tutorials.
Below, I will briefly describe each chapter and present my images that I made following the tutorials.
Week One
Day 1: Introducing the Photoshop Interface--Get acquainted with Photoshop's menus, toolbox tools, and
palettes and learn to navigate with keyboard shortcuts.
Day 2: Customizing Photoshop Preferences--Includes everything you need to know about customizing Photoshop's
preferences: displays, cursors, rules, guide, memory, and more. I thought this was an excellent chapter on preferences,
and used it for a problem I had with my plug-ins and scratch disks.
Day 3: Checking Out the New 5.0 Features--Briefly reviews the new features of version 5, including coverage
of color management, the History palette, the new tools, enhanced actions capabilities, and the text editor. I
liked the fact that there was a thorough separate chapter explaining the new features. Some books will give you
just a cursory description in the front of the book and you have to go to individual chapters to get a full picture.
Day 4: Getting a Handle on File Types--Covers Photoshop's most frequently used file formats and how to use
them to your advantage. This chapter covers just the right amount of information of file types so you don't get
overwhelmed by the complexity but can impress your friends with your new knowledge of such concepts as: lossy,
JPEG, and GIF. There is a great table showing the size of a file when it is saved using different file formats.
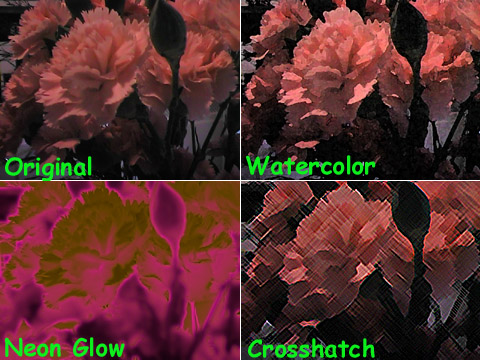
Day 5: Importing Existing Images and Creating New Ones--Teaches you how to acquire images, whether you're
using a digital camera, scanning a photograph, or creating an image from scratch. The image to the right indicates
how you can use filters.
Day 6: Saving, Exporting, and Printing Images--An easy day of saving and printing your images and learning
to export them for use on the Web. The chapter provides pertinent information on saving a file in the GIF format.
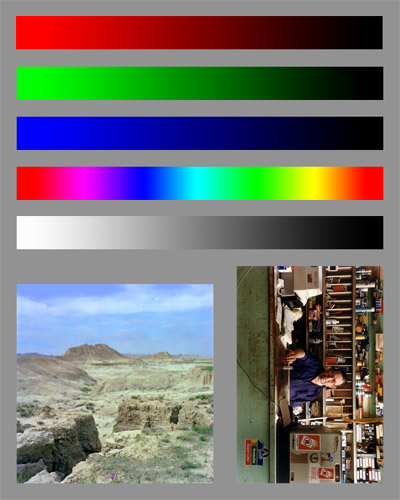
Day 7: Calibrating Your System and Setting Color Modes--Get acquainted with color models, color depth, color
palettes, and color calibration. Color models can be confusing to beginners. This chapter presents just enough
information on the differences between grayscale, duotone, indexed color, RGB, CMYK, etc. to get you started.
Week Two
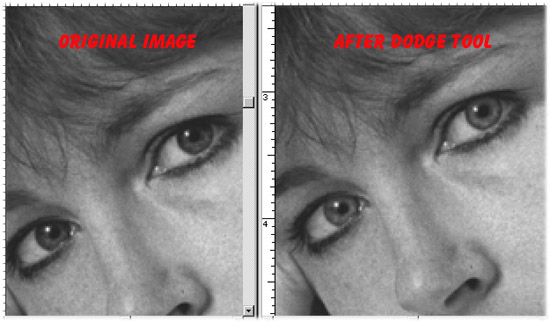
Day 8: Understanding the Editing Tools--Learn what to do with
the editing tools to 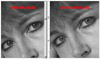 create
great imagery: dodging, burning, blurring, sharpening, smudging, and
rubber stamping. This is a fun chapter. The author provides you with
an image of his wife to use with the Dodge and Burn tools. I follow create
great imagery: dodging, burning, blurring, sharpening, smudging, and
rubber stamping. This is a fun chapter. The author provides you with
an image of his wife to use with the Dodge and Burn tools. I follow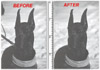 ed
the tutorial in the book, using the Dodge tool to lighten the eyes
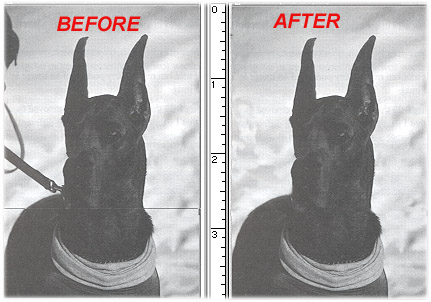
on the image. One of my favorite tools from this chapter is the Rubber
Stamp tool. The author describes how you can use this tool to remove
a leash from an image of a dog. As the dog images were not provided
on the CD, I scanned them in, used the Rubber Stamp tool as described
in the book, and eliminated the leash. ed
the tutorial in the book, using the Dodge tool to lighten the eyes
on the image. One of my favorite tools from this chapter is the Rubber
Stamp tool. The author describes how you can use this tool to remove
a leash from an image of a dog. As the dog images were not provided
on the CD, I scanned them in, used the Rubber Stamp tool as described
in the book, and eliminated the leash.
Day 9: Creating Selections and Defining Paths--Find out how
the selecti on
tools work, as well as how to define and edit both selections and
paths. There is a sample image on the CD to use to learn how to select
text that is filled with several colors by selecting the background,
use the Similar command to add to the selection, and use the Inverse
command to then select the text. I followed the tutorial, cut out
the text, and pasted it into a new image with a different background.
This is a valuable chapter on material that can be difficult. The
author provides just enough information and examples to explain the
material without overwhelming you. on
tools work, as well as how to define and edit both selections and
paths. There is a sample image on the CD to use to learn how to select
text that is filled with several colors by selecting the background,
use the Similar command to add to the selection, and use the Inverse
command to then select the text. I followed the tutorial, cut out
the text, and pasted it into a new image with a different background.
This is a valuable chapter on material that can be difficult. The
author provides just enough information and examples to explain the
material without overwhelming you.
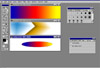
Day 10: Using the Painting and Drawing Tools--Covers working with the painting and drawing tools, customizing
the brush styles, and understanding the ins and outs of anti-aliasing. I had fun with this chapter using gradients.
Day 11: Masking with Layer Masks and Quick Masks--Everything
you need to know about layer masks, quick masks, and Adjustment layers.
The author provides a variety of images on the CD to use for the tutorials
in this chapter. It is really helpful to b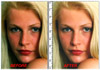 e working on the same images
as the author before you attempt to use the techniques on your own.
The images to the right are an example of what you can do with Adjustment
layers, such as change the color balance, change the brightness/contrast,
and change the color cast. The original image, from the CD, was somewhat
dark, a little too green, and needed to be brightened. Following the
tutorial, I produced a much better image. e working on the same images
as the author before you attempt to use the techniques on your own.
The images to the right are an example of what you can do with Adjustment
layers, such as change the color balance, change the brightness/contrast,
and change the color cast. The original image, from the CD, was somewhat
dark, a little too green, and needed to be brightened. Following the
tutorial, I produced a much better image.
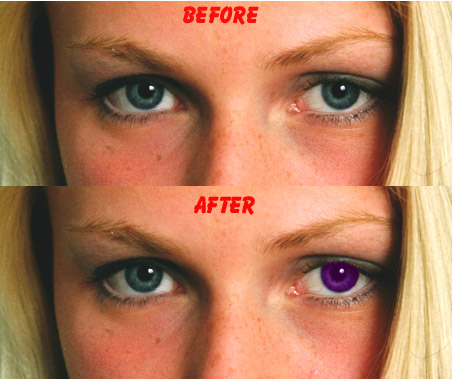
Day 12: Working with Channels--Get a handle on what a channel
is, as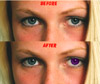 well as how channels can be used to create selections and special
lighting
well as how channels can be used to create selections and special
lighting  effects.
The image to the right shows how you can change the color of one portion
of an image while leaving the rest unchanged by using a channel to
create a selection. Using an image from the CD and the tutorial, I
changed the color of the iris from green to mauve. The button on the
left was made using a tutorial. I worked with channels and then the
Render>Lighting Effects filter to give the button a 3D effect. effects.
The image to the right shows how you can change the color of one portion
of an image while leaving the rest unchanged by using a channel to
create a selection. Using an image from the CD and the tutorial, I
changed the color of the iris from green to mauve. The button on the
left was made using a tutorial. I worked with channels and then the
Render>Lighting Effects filter to give the button a 3D effect.
Day 13: Layering Your Images--Learn how to work with the L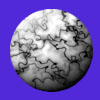 ayers palette, create
and apply multiple layers, and work with the various layering modes.
The monkey image was created from a tutorial using layer links and
transform effects. Using different layering modes can be used to make
unique buttons such as the textured button to the left made from a
tutorial. ayers palette, create
and apply multiple layers, and work with the various layering modes.
The monkey image was created from a tutorial using layer links and
transform effects. Using different layering modes can be used to make
unique buttons such as the textured button to the left made from a
tutorial.
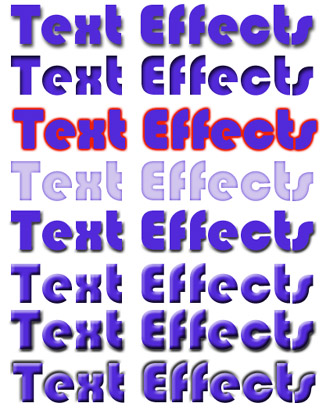
Day 14: Typing In Great Type Effects--Create, import, select,
and edit you r
text, and learn how to design special effects with type. Photoshop
comes with some built-in filters that work w r
text, and learn how to design special effects with type. Photoshop
comes with some built-in filters that work w ell
with text. They are fun to play with and easy to use. The image to
the left is an example of how you can select a portion of an image
and define a pattern with it to fill in text. I started with the sunset
picture from the CD and created the filled sunsets text. ell
with text. They are fun to play with and easy to use. The image to
the left is an example of how you can select a portion of an image
and define a pattern with it to fill in text. I started with the sunset
picture from the CD and created the filled sunsets text.
Week Three
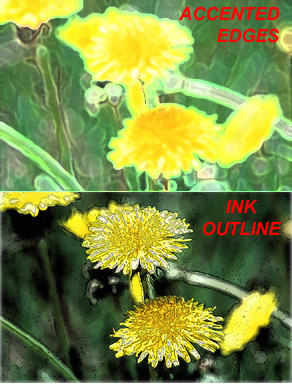
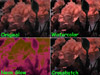
Day 15: Applying Filter Effects--Install and work with native
and third-party filters, an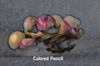 d
use arti d
use arti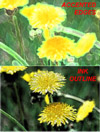 stic,
brush stroke, and distortion filters to come up with neat special
effects. Photoshop comes with a variety of filters that you can apply
in a matter of seconds and they produce unique images. The fruit photo
on the right has been enhanced with an Artistic filter called the
Colored Pencil. The dandelion photo has been enhanced with Brush Strokes
filters: Accented Edges and Ink Outline. This chapter also covers
third-party plug-ins such as products by Auto F/X, Extensis, and Alien
Skin. Please see our reviews of some of these plug-ins. stic,
brush stroke, and distortion filters to come up with neat special
effects. Photoshop comes with a variety of filters that you can apply
in a matter of seconds and they produce unique images. The fruit photo
on the right has been enhanced with an Artistic filter called the
Colored Pencil. The dandelion photo has been enhanced with Brush Strokes
filters: Accented Edges and Ink Outline. This chapter also covers
third-party plug-ins such as products by Auto F/X, Extensis, and Alien
Skin. Please see our reviews of some of these plug-ins.
Day 16: Correcting the Color--More coverage of color, including
how t o
use the Color Balance and Curves features to adjust color levels.
This chapter is quite detailed and goes into depth on the subject
of color and some of the techniques covered in Day 11 and Day 12.
The author also discusses how to prepare a personalized image template
to give you better control over your color output. o
use the Color Balance and Curves features to adjust color levels.
This chapter is quite detailed and goes into depth on the subject
of color and some of the techniques covered in Day 11 and Day 12.
The author also discusses how to prepare a personalized image template
to give you better control over your color output.
Day 17: Retouching and Repairing Images--Retouch the effects
of poor lighting/flash, improve the brightness and contrast of old
photos, and remove dust marks, scratches, and other blemishes. The
author provides you with a black and white photo to experiment with
for retouchi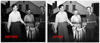 ng and repairing. With
the image of the fishermen you use a mask so you can work on separate
parts of the photo. If you try to fix the contrast and brightness
so that you can see more detail in the person on the right, you'll
wash out the guy on the left. Using the mask and the Magnetic Lasso
tool you can adjust the brightness, shadows, gray levels, and highlights. ng and repairing. With
the image of the fishermen you use a mask so you can work on separate
parts of the photo. If you try to fix the contrast and brightness
so that you can see more detail in the person on the right, you'll
wash out the guy on the left. Using the mask and the Magnetic Lasso
tool you can adjust the brightness, shadows, gray levels, and highlights.
Day 18: Saving Time with Actions--Focus on saving time with
actions: learn what an action is and how to work with the Actions palette, and create and run your
own and built-in actions. Actions can be really great as they automate
a series of steps and processes that can be time consuming. The balloon
photo, from the CD, shows the Photoshop Clear Emboss action applied
to the text. The author also
is and how to work with the Actions palette, and create and run your
own and built-in actions. Actions can be really great as they automate
a series of steps and processes that can be time consuming. The balloon
photo, from the CD, shows the Photoshop Clear Emboss action applied
to the text. The author also  demonstrates
how to create your own actions. Following a tutorial from the book,
I created an action for a text drop shadow effect, which can be seen
on the image to the left. If you really like using actions, there
are other third-party actions on the CD that comes with the book. demonstrates
how to create your own actions. Following a tutorial from the book,
I created an action for a text drop shadow effect, which can be seen
on the image to the left. If you really like using actions, there
are other third-party actions on the CD that comes with the book.
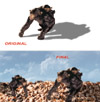
Day 19: Compositing Two or More Images into One--Find out
how to effectively c reate
a collage of multiple photos and learn to create your own photo montage.
Collages are a collection of items from different sources, and a montage
is created in such a way as to fool the viewer into believing that
the composite image was not manipulated in any way. The author provides
demonstration of each. I created the collage on the right by following
the tutorial in the book and using the images provided on the CD. reate
a collage of multiple photos and learn to create your own photo montage.
Collages are a collection of items from different sources, and a montage
is created in such a way as to fool the viewer into believing that
the composite image was not manipulated in any way. The author provides
demonstration of each. I created the collage on the right by following
the tutorial in the book and using the images provided on the CD.
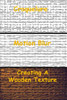
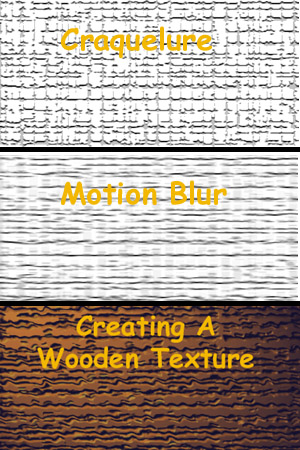
Day 20: Adding All Kinds of Special Effects--The special effects chapter: how to create wood and brushed
metal textures, variations of drop shadows, and amazing glows. The image to the right demonstrates a wooden texture.
Day 21: Preparing Your Art for the Web--Move your GIFs and JPEGs out on the Web, and learn how to create
easy, seamless tiles and visitor counters. This is an important chapter on creating GIFs for anyone planning to
create a Web page.
Appendix A: Keyboard Shortcuts and Tool Documentation
Appendix B: Troubleshooting Guide
Appendix C: What's on the Companion CD?
|


 SAMS
Teach Yourself Adobe Photoshop 5 in 21 Days
SAMS
Teach Yourself Adobe Photoshop 5 in 21 Days