Notes for Dr. Garrett
10-26-99
ESRI NOTES: PART ONE...CLIPPING A SUBIMAGE
1. Start a new project in ArcView 1. Open an .img file as an IA image source.
2. Zoom into desired subarea you wish to clip
3. Under Image Analysis menu, set "Analysis Extent" to "SameAsDisplay" and
click "OK"
4. Under Theme menu, select "Save Image" and save it as "IMAGINE image"
5. At this point you will be offered the chance to add the new clipped image
to your current project if you wish otherwise it will just be stored where you
choose. If you choose to add it, notice that in the left panel, under its name
will be colored text notations such as " :Layer_4", " :Layer_3" indicating that
it is a multispectral file.
PART TWO...CONVERT THE NEW MULTISPECTRAL SUBIMAGE TO INVIDUAL GRID(RASTER)
FILES FOR EACH OF THE SPECTRAL BANDS
1. In an open project click the "Add Theme" button.
2. Open that clipped subimage that you just saved, but not as IA source, rather
choose "Image Data Source".
3. The file appears in the left listing panel, but unlike above, has no indication
of possessing layers, this is okay. In some cases the image opens as all black,
this is okay also.
4. Under the Theme menu, "Convert To Grid.." is now active. Select it.
5. It will query you "Convert All Bands"....Yes.
6. You can name each band as you wish.. Note that it is telling you band numbers.
7. After it creates the grid files it offers you the option to add to the current
project or just leave them stored on disk. 8. If you add them to your project
they are offered as brightness classified images which you can adjust classification
ranges and color ramps on.
8. Note that with the creation of each new band, a file folder with its name
is created, containing the following files
- dblbnd.adf (about 1k)
- hdr.adf (about 1k)
- sta.adf (about 1k)
- vat.adf (about 1k)
- w001001.adf (about 170k)
- w001001x.adf (about 6K)
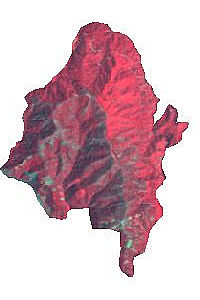
CLIPPING A POLYGONAL ESTIMATE OF A WATERSHED FROM THE IMAGE IN PART ONE
|
1. "New Theme" polygon type, name it, save it
2. it appears in your project, checked and dotted line around check box
indicating it is editable.
3. Make sure the underlying .img file is checked for visibility and active.
4. Select your polygon drawing tool.
5. After finishing drawing the watershed boundary polygon, make sure
that you have made it active, then under Theme, select "Stop Editing",
save it.
6. Go back and make you clipped, multilayer .img file active.
7 Under Image Analysis, "Properties" set "Analysis Mask" to the mask
polygon you just created.
8. You can now add this to your current project or not. Note: you can
go through the procedure to turns this polygonal area into grid format,
BUT the larger original, rectangular area is still a part of the file
for that purpose. True file clipping has not occurred.
|
 |
