river
mortenson
|
river
mortenson
|
 |
Week
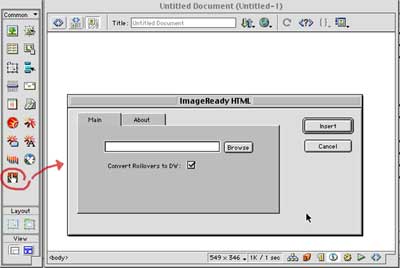
5 Method 4 - Dreamweaver with extension |
| Method 1 HTML| Method 2 ImageReady | Method 3 Dreamweaver | Method 4 Extension |